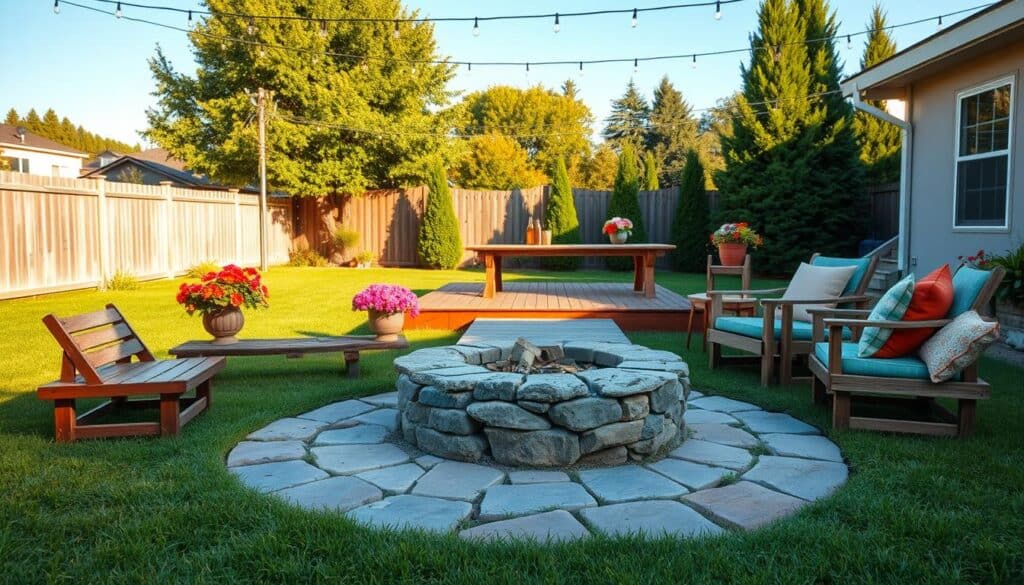
Turning your backyard into a pro landscape is simpler than you think. Many homeowners want a stunning focal point. Learning how to build a simple garden arbor that frames a view or entry is a great start for your woodworking adventure.
This project is a fantastic way to boost your outdoor area with little effort. It adds an elegant structure, making your yard more welcoming. It also supports climbing plants beautifully.
You don’t need to be a pro carpenter to get great results. This guide gives you clear steps for success. Discover how to build a simple garden arbor that frames a view or entry and see your garden’s charm and value soar. Let’s start making a piece that will be the heart of your outdoor space for years.
Visit The Marketplace or grab your Free Garden Starter Kit
Planning Your Garden Arbor Design and Location
Before you start building, plan your garden arbor design carefully. This ensures it matches your yard perfectly. A well-placed archway can turn a simple path into a beautiful highlight.
When starting your diy garden projects, think about how much cardboard is needed to stop weeds. Measure the area where your walkway or gate is. This helps avoid a structure that’s too big or too small. Choosing the right size is key for looks and durability.

Should you build from scratch or use pre-cut timber arbor kits? Kits are great for beginners, but custom designs let you be creative. Both can look amazing if you use quality materials that last.
Remember your budget to make an affordable yard archway that lasts. Smart material selection and good site prep save money. This way, your project will be both beautiful and strong for years.
Essential Tools and Materials for Your DIY Project
Before starting your easy arbor project, it’s important to gather the right supplies. This guide will help you prepare everything you need before you start. Having your tools ready saves time and avoids extra trips to the store.
To build a strong diy garden arbor, you’ll need some basic power tools. A circular saw, cordless drill, and level are key for straight cuts and strong joints. Don’t forget a tape measure, speed square, and exterior-grade deck screws.

When picking your wood, knowing the standard sizes is important to avoid waste. Most designs use 4×4 posts for the base and 2×4 or 2×6 for the rafters and sides. Buying pre-cut wood can make your project easier and save money.
Choosing between a cedar garden arbor and a pressure treated wood arbor depends on your climate and budget. Cedar is known for its natural rot resistance and beautiful grain. Pressure-treated pine is cheaper and works well with moisture if sealed properly.
Here’s a quick list to take to the hardware store:
- Circular saw and drill
- Tape measure and level
- Exterior-grade deck screws
- 4×4 posts for the base
- 2×4 or 2×6 boards for framing
- Wood stain or exterior paint
Preparing the Ground and Setting Your Posts
A solid foundation is key for a lasting garden structure. Learning to build a garden arbor shows that the base is everything. Without a strong base, even the most stunning design will lean or shift over time.
Start by checking your diy wood arbor plans to mark the structure’s footprint. Remove any grass, rocks, or debris to get a level surface. A clean area makes the whole process easier and more precise.
This guide focuses on a base that can handle wind and weight. It doesn’t matter if you’re building on soft soil or a hard patio. The goal is to stop the structure from moving. Here are the key steps to align your posts correctly:
- Measure the distance between posts twice to ensure a perfect square.
- Dig holes at least 24 inches deep to reach below the frost line.
- Use a level to check for vertical alignment on all sides.
- Brace the posts with scrap lumber while the concrete cures.

Proper arbor post installation needs patience and the right tools. If you’re working with soil, setting arbor posts in concrete is the best way for lasting stability. The concrete acts as a heavy anchor, preventing the wood from rotting and the structure from wobbling.
If you’re working on existing hardscapes, you’ll need special hardware. Metal post bases or brackets can be bolted into concrete or pavers. Always use galvanized or stainless steel hardware to avoid rust and keep your arbor safe for years.
Constructing the Main Frame and Side Panels
Building the main frame is where your vision comes to life in your backyard. Learning how to make a wooden arch is a rewarding easy backyard woodworking project. Start by building the side panels, which form a strong base for the whole structure.
When working on your wooden arbor plans, precision is key. A diy wooden arbor frame needs precise measurements to fit perfectly with your vertical posts. Taking your time here avoids problems later when you start the roof.

Getting your arbor frame square and level is essential for a professional look. If you’re adding a diy arbor with lattice, install the panels first. This makes attaching the lattice to the side rails easier.
To keep your structure stable and looking good, follow these steps for your diy outdoor wood arch:
- Measure the distance between your posts to cut your side rails to the exact length.
- Use a level to confirm that your horizontal supports are perfectly flat before driving in screws.
- Attach the lattice panels using exterior-grade fasteners to prevent rust and wood decay.
- Check the diagonal measurements of your frame to ensure the structure is perfectly square.
Proper alignment is vital for your climbing plants to have a solid surface as they grow. Once the side panels are in place, your project will start to look like a beautiful garden feature. This solid base is perfect for adding decorative elements next.
Building the Roof and Decorative Archway
Adding a roof to your arbor makes it a beautiful garden focal point. This is the last step of your beginner woodworking garden project. It adds height and interest, defining your outdoor area.
For the wooden arch roof construction, you can choose from flat or curved designs. A flat roof is cheaper because it needs less material. You can also adjust the slat spacing for a unique look.

To build a garden arbor on a budget, keep it simple. Many people make a cheap diy garden arbor for under $150. They use standard lumber and skip fancy hardware.
Using leftover materials, you can make a scrap wood garden arbor. These landscaping entryways are great for dividing your yard. With some creativity, your budget backyard arbor will look like it was done by pros.
How to Build a Simple Garden Arbor That Frames a View or Entry
You can make your garden look amazing by placing your arbor right. It’s all about how to build a simple garden arbor that frames a view or entry. This turns your backyard into a beautiful scene.
Think of your backyard garden archway as a doorway to different parts of your yard. It leads to a patio or a secret garden. This makes people want to see more of your yard.

For framed garden view ideas, find spots like a colorful flower bed or a distant tree line. Your arbor should point to these spots. It makes the best parts of your yard stand out.
A good garden pathway entrance is like a welcome sign. Make sure it’s wide enough for people to walk through comfortably. A clear path makes visitors feel like they’re arriving somewhere special.
Adding vertical garden structures brings height and greenery to your design. Climbing plants will make the wood look softer. With these tips, you’ll have a beautiful mix of nature and design that lasts.
Selecting the Best Climbing Plants for Your Arbor
Your landscape arch design comes alive with the right climbing plants. These plants soften the wooden structure and blend it into your yard. The right species make your garden feel natural and cohesive.
When framing your outdoor archway, choose plants that cover well but don’t harm the wood. Avoid vines that trap moisture, which can decay the wood. Light climbers are best for a lush canopy without the weight.

Think about how your plants support your garden all year. Some bloom in spring, while others offer foliage into autumn. Layering different plants keeps your arbor beautiful all season.
For your garden design with arbor, consider these reliable climbers for your garden entry arbor:
- Clematis: Known for stunning, large flowers and a lightweight habit that is perfect for wooden structures.
- Climbing Roses: These provide a classic, romantic look and a wonderful fragrance that welcomes guests.
- Star Jasmine: An excellent choice for warmer climates, with evergreen leaves and scented white flowers.
- Sweet Peas: A fantastic annual option if you want to change your color palette every single year.
- Honeysuckle: A vigorous grower that attracts pollinators and provides a lush, cottage-garden aesthetic.
Remember to add support like twine or wire as your plants grow. This helps them climb up and prevents tangling. With proper care, your arbor will enchant everyone who sees it.
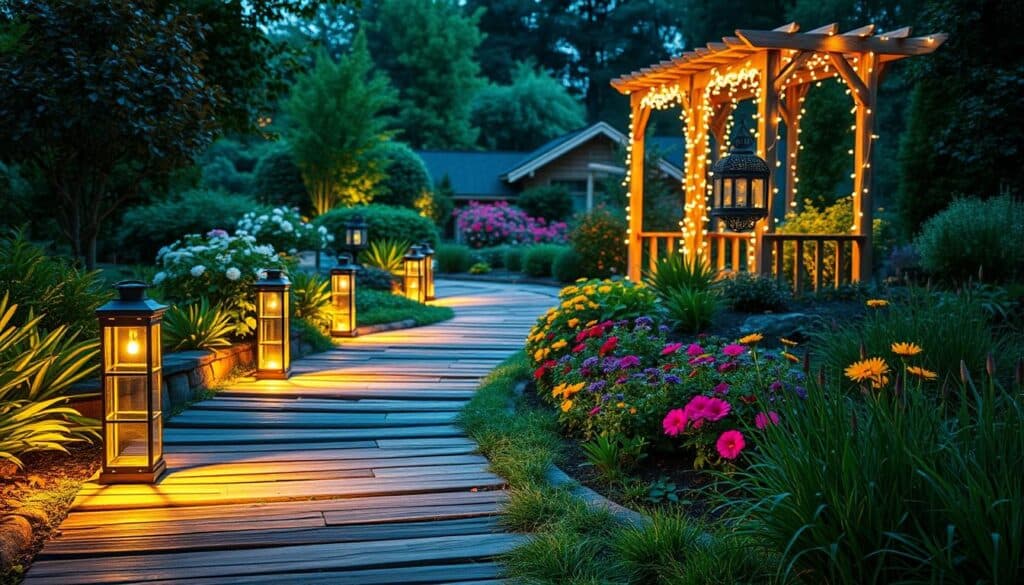
Landscaping Ideas to Enhance Your New Garden Focal Point
Your new garden structure is a blank canvas for creative landscaping ideas. After building your front yard garden arbor, the area around it is ready to show off your style. Choosing the right design makes your project fit right in with the rest of your yard.
Begin with curb appeal yard projects that lead the eye to your new feature. A stone border or soft mulch beds around your diy garden entrance look great. These small touches make your yard look put together.

Think about adding walkway arbor ideas to guide visitors to your home. Installing path lighting along the walkway is a smart move. It’s safe and shows off your design at night.
Choosing the right plants is key for your front yard landscaping arch. Pick plants that match the size of your entry arbor construction. This way, your structure stays the main attraction. Here are some tips:
- Plant low-growing perennials to frame the base of the posts.
- Use ornamental grasses to add texture and movement near the entrance.
- Incorporate seasonal flowers for a pop of color that changes throughout the year.
- Add decorative river rocks to create a natural transition between the lawn and the arbor.
By picking the right plants and hardscaping, you make your yard welcoming. These details turn a simple project into a beautiful focal point that increases your property’s value.
Conclusion
Building a beautiful garden structure changes how you experience your outdoor space. A well-placed pathway framing archway creates a sense of arrival. It invites guests into your yard.
You now have the skills to construct a sturdy backyard gateway trellis. This trellis will stand the test of time.
Understanding trellis and arbor differences helps you choose the right support for your plants. A simple rose arch diy project provides a delicate look. On the other hand, a robust wisteria arbor structure offers a grander aesthetic.
You can select the best vines for garden arbor success. Match the plant weight to your frame.
Consider a clematis support trellis for smaller spaces. Or a heavy-duty grapevine arbor for a lush, edible canopy. These flowering archway ideas bring vertical plant support to life in any landscape.
Whether you prefer a climbing plant arch or a trellis for climbing roses, your new feature serves as a stunning focal point.
Regular maintenance keeps your wood or metal structure looking fresh throughout the seasons. Prune your vines often to encourage healthy growth. This prevents damage to the frame.
Enjoy the process of watching your garden evolve as your chosen plants climb toward the sky. Your hard work creates a lasting legacy of beauty in your own backyard.