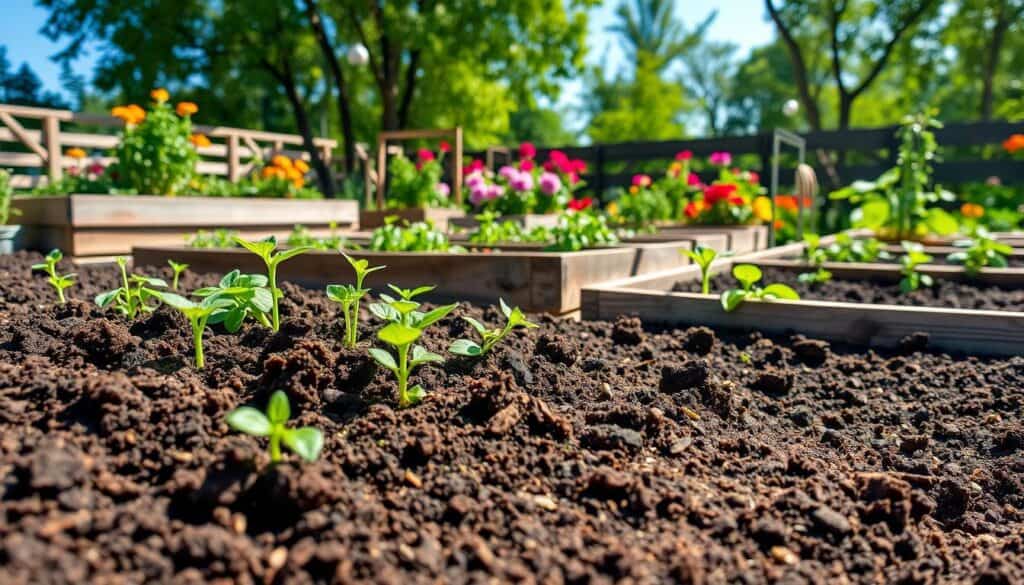
Turning your backyard into a personal oasis doesn’t need to cost a lot. You can make your outdoor space more charming with a simple weekend project. Learning How to Make Concrete Garden Stepping Stones at Home for Under $20 is a great way to be creative and practical.
These custom stepping stones make a durable path and show off your style. You can make them using common items from a local hardware store. This way, your yard looks great without the high prices of store-bought items.
Choosing homemade garden decor lets you make your landscape truly yours. You can go for a rustic or modern look, and it’s very rewarding. Let’s explore how to create your own path and make your outdoor space beautiful and affordable.
Visit The Marketplace or grab your Free Garden Starter Kit
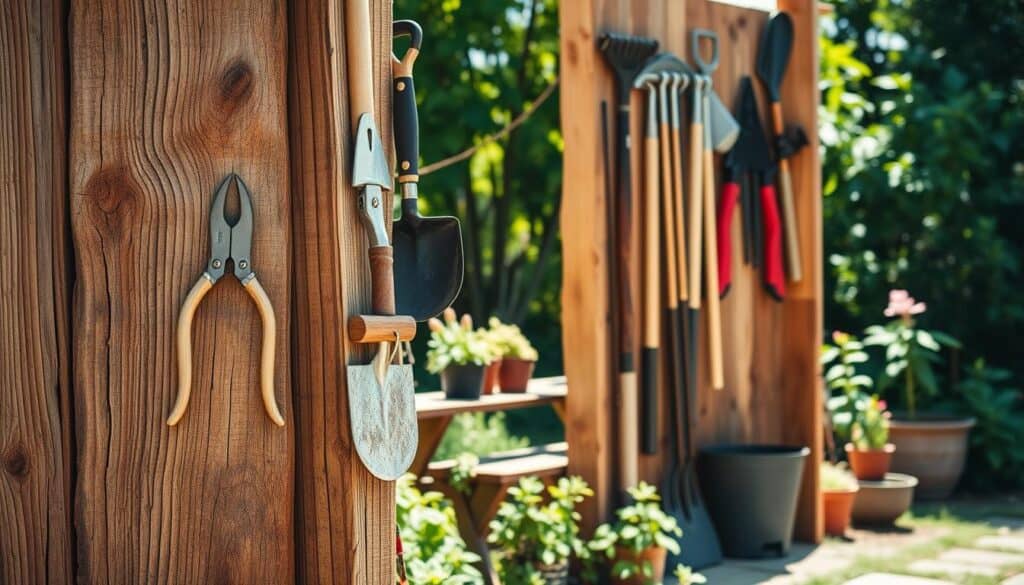
Essential Tools and Materials for Budget-Friendly Projects
Creating beautiful pathways doesn’t have to be expensive. You just need the right tools. Before starting, it’s important to gather the right supplies to keep costs low. By choosing materials wisely, you can get great results without spending more than $20.
Many tools you need are probably in your garage or shed. You don’t need to buy expensive professional gear to make diy garden stepping stones. Here are the basic things you need to save money:
- A sturdy plastic bucket for mixing concrete.
- A metal trowel to smooth and shape your stones.
- Rubber gloves to protect your skin from harsh materials.
- A dust mask to ensure safety while handling dry concrete mix.
- Old cooking oil or petroleum jelly to grease your molds.

Using these simple tools lets you spend your budget on concrete and decorations. This way, you’re well-prepared to start your project confidently and efficiently. With these budget-friendly landscaping ideas, you can beautify your outdoor space without spending too much.
The quality of your diy garden stepping stones depends more on your patience than on expensive tools. Take a moment to organize your workspace. Make sure all your tools are clean and ready. Once you have everything, you’re ready to start your creative project.
How to Make Concrete Garden Stepping Stones at Home for Under $20
Making concrete garden stepping stones at home is a fun weekend project. It’s a great way to save money and add a personal touch to your garden. You only need basic materials from a local hardware store.
This affordable stepping stone tutorial will show you how to do it. You don’t need fancy tools to start. Just a bag of concrete mix and some household items will do the trick.

The key to durable cement stepping stones is a well-mixed concrete. This ensures your stones last for many years. They will also look great in your garden.
Learning to make diy concrete stepping stones can really improve your garden’s look. It’s easy to make more stones once you get the hang of it. Start with a small batch and watch your garden transform.
Preparing Your Workspace for Success
A well-organized workspace is key to any successful home project. When planning your outdoor diy projects, having a dedicated area helps. It allows for better movement and faster cleanup. Choose a flat, level surface for even curing of concrete stones.
Creating a stable foundation is vital for these inexpensive backyard projects. Uneven ground can cause molds to shift, leading to uneven results. Clear debris and level the dirt or patio area for a professional finish.

Using thrifty home improvement strategies can save you money. You don’t need expensive equipment for a functional station. Follow these simple steps to keep your area tidy:
- Clear a space at least twice the size of your project area.
- Use a tarp or heavy plastic sheet to protect your patio or grass.
- Keep your mixing buckets and water source within arm’s reach.
- Organize your tools on a nearby table to avoid bending over repeatedly.
These tasks are great family friendly garden projects for everyone to join in safely. Involving children or friends in your backyard makeover ideas keeps the atmosphere light. A clean workspace prevents accidents and makes everyone feel included.
Viewing this setup as an easy weekend diy task reduces stress. Preparing your space before mixing concrete sets you up for a smooth experience. A little preparation can lead to beautiful garden decor.
Creative Mold Ideas Using Household Items
Your recycling bin is full of treasures for garden projects. You don’t need fancy tools to make diy mold making at home. Just use everyday items to create custom garden molds that show off your style.

Kitchen items make great stepping stone templates for your path. They’re a smart way to get cheap outdoor decor without losing quality or style. Here are some items to try for your next project:
- Plastic food storage containers for uniform circles or squares.
- Old cake pans or silicone baking molds for detailed patterns.
- Sturdy cardboard boxes lined with plastic wrap for unique shapes.
- Plastic nursery pots for decorative cement planters.
These creative home crafts let you play with different textures and sizes. Many plastic containers are tough, making them great reusable stone molds for concrete. Just make sure the surface is smooth and lightly oil it before pouring for easy release.
Choosing the right mold is key for a pro finish. Your kitchen might have just what you need, whether you want a rustic or modern look. Start small, be creative, and enjoy making a custom garden path on a budget.
Mastering the Concrete Mixing Process
Learning to mix concrete is key to making your backyard look great and last long. Getting the right mix is what makes cement stepping stones strong and smooth. This beginner’s guide will show you how to mix concrete right, avoiding common mistakes.
When using bags of ready mix concrete, the water-to-mix ratio is very important. You want the mix to be as thick as peanut butter or oatmeal. Too much water can make your diy concrete stepping stones weak and prone to cracking.

Whether you’re using quikrete stepping stones mix or a special concrete mortar for crafts, always follow the package instructions. Start by adding a little water to the dry mix and mix well. You can add more water, but it’s hard to take it out once it’s mixed.
For small projects, mixing concrete in buckets is best. Use a strong trowel or a heavy-duty drill with a mixing attachment. This ensures all dry parts are mixed in well. This careful mixing is key for a bubble-free finish that lasts.
Techniques for Decorative Surface Finishes
Turning a plain slab into art is easy with a few simple steps. After pouring concrete into your mold, you have a short time to make it look special before it hardens.
To get a smooth finish concrete look, use the right surface finishing tools. A steel trowel or magnesium float works well for smoothing wet concrete. Move the tool in wide, smooth strokes to even out the surface.

For a rustic look, try textured concrete surfaces. Press big leaves into the wet concrete to make leaf imprinted stones. This adds a unique, organic feel to your path, like it’s from a fancy store.
For a more structured design, use stamped concrete patterns to look like pavers or brick. Mixing in colored concrete mixes early on can give it a natural stone look concrete. These tweaks can make your space look high-end without the high cost.
Personalizing Your Stones with Artistic Accents
Turn your paving into economical garden art with a few simple steps. Add small objects to your wet concrete to make a unique piece. This way, you can show your style without spending a lot.
For mosaic stepping stone designs, pick materials that can handle the outdoors. Use broken tiles, glass beads, or river pebbles for patterns. These artistic garden accents bring texture and interest that plain concrete can’t.

Ready to decorate? Here’s how to keep your personalized yard art safe:
- Press your chosen items firmly into the surface while the concrete is soft.
- Make sure the tops of the items are even with the concrete to avoid tripping.
- Wipe off any extra concrete from glass or tiles with a damp sponge.
- Let the stones set fully before placing them in your garden path.
These handmade pieces are also great customized gift ideas. They have a special touch that store-bought items don’t. Whether for your yard or as a gift, these stones will be a beautiful part of your outdoor space for years.
Curing and Demolding Your Creations
Turning liquid concrete into lasting garden art needs patience and the right steps. When curing concrete at home, let it slowly hydrate and harden. This way, it reaches its best strength.
Before pouring, apply a top-notch stepping stone release agent inside your molds. This step stops the concrete from sticking to the mold. It makes removing the concrete easy and clean.

For the best quikrete stepping stones, place molds in a shaded area. Avoid direct sunlight to prevent cracks. Mist the surface with water lightly for the first 24 hours to keep it moist.
Wait 24 to 48 hours before demolding. Rushing can chip or break the stone.
After removing, let the stones cure concrete at home for a week in a cool, dry place. This extra time makes your quikrete stepping stones strong and ready for your garden.
Remember, a good stepping stone release agent is key for clean edges. Follow these steps for durable and beautiful garden decor that lasts.
Placement Strategies for Your Garden Pathway
Setting up your homemade stones is a fun way to improve your home’s budget friendly curb appeal without breaking the bank. It’s great for gardening for beginners who want to see quick changes in their yard. With careful planning, you can make a cheap garden pathway solution that looks like it was done by a pro.
Before digging, lay your stones on the grass to check the spacing. A homemade garden path should feel natural and easy to walk on. Try for a stride length of 18 to 24 inches between stones for a affordable garden pathways that works well.

Choose a style that fits your taste and yard layout. For modern garden pathways, go for a straight line that leads to your front door. For whimsical garden pathways, try a winding path through your flowers. These low cost landscape ideas bring charm to any backyard.
To keep your project affordable and looking good, follow these tips:
- Clear the path: Remove sod and level the soil to keep stones stable.
- Add a base: Use sand or gravel under each stone for stability.
- Prioritize drainage: An eco friendly garden path lets water soak into the ground.
- Fill the gaps: Use mulch or creeping thyme between stones for a lush look.
By following these easy steps, you’ll make a walkway that’s both durable and attractive. Your new path will be a beautiful spot that welcomes guests to explore your garden.
Maintenance Tips for Long-Lasting Garden Decor
Your new garden path needs a bit of care to stay looking great. A small amount of time spent on upkeep will keep it looking like new. This way, your garden path will last a long time.
Using the right concrete sealing techniques is key. A good sealer keeps moisture out, preventing cracks. This makes your homemade garden path strong and resistant to stains and weather.

Keeping your stones clean is also important. Sweep away leaves and dirt often to stop moss or algae. Treating your stones as weatherproof outdoor crafts means they’ll last all year without wearing out.
Here are some easy habits to keep your garden looking good:
- Clear away organic debris like wet leaves weekly.
- Apply a fresh coat of concrete sealer every two years.
- Gently scrub the surface with mild soap if stains appear.
- Check for any loose stones or shifting soil after heavy rain.
These pocket friendly garden upgrades are easy to do but make a big difference. With a little care, your garden decor will stay beautiful and functional for years.
Conclusion
Creating your own stepping stones is a fun way to make your outdoor space better without spending a lot. You can now make durable features that show off your style using simple materials.
These affordable projects show that you don’t need a big budget to enhance your home. Even small changes can make a big difference in how your home looks.
We suggest trying out new shapes and textures. These projects are a great start for homeowners who love DIY. They can lead to even bigger landscaping projects.
Your garden is a place where you can let your imagination run wild. Adding homemade decor lets you show your personality in every part of your lawn.
Don’t just stop at making stepping stones. Look for more affordable landscaping ideas to make your whole yard look great.
Good, yet affordable outdoor decor can really make your patio or walkway look better. Share your designs with your neighbors. It might inspire them to start their own DIY projects.